Docker
Docker is a powerful platform designed to streamline the development, shipping, and execution of applications through the use of containers. Containers provide isolated environments that encapsulate software, libraries, and configuration files, ensuring that applications operate consistently across various environments. Docker facilitates the decoupling of applications from infrastructure, enabling rapid software delivery and effective management.
Dockerfile
A Dockerfile is a set of instructions used to create a Docker image. It defines the base image, configures the environment, installs dependencies, copies necessary files, and specifies the command to execute the application. This automation is crucial for simplifying the creation and deployment of Docker containers.
Docker Build
Docker Build is a feature of the Docker Engine that allows users to generate Docker images based on a series of instructions outlined in a text file known as a Dockerfile. These instructions detail how to construct the image, including actions such as copying files, installing dependencies, and configuring the environment required to run an application.
Docker Container
A Docker container is a lightweight, standalone, executable package that contains everything needed to run a specific piece of software: code, runtime, system tools, libraries, and settings. It operates in isolation from the host system, guaranteeing consistent and reliable performance across various environments.
Running Docker Containers
Installing Docker on Ubuntu/Debian
In this guide, we will outline the steps to install Docker on Ubuntu or Debian, enabling you to efficiently create, manage, and deploy containerized applications.
Installation Steps for Ubuntu
Step 1: Update and Upgrade the System
Ensure your system is up to date:
sudo apt-get update -y
Step 2: Install Required Packages
Install necessary packages and certificates for Docker installation:
sudo apt-get install ca-certificates curl
sudo install -m 0755 -d /etc/apt/keyrings
Step 3: Add Docker's Official GPG Key
sudo curl -fsSL https://download.docker.com/linux/ubuntu/gpg -o /etc/apt/keyrings/docker.asc
sudo chmod a+r /etc/apt/keyrings/docker.asc
Step 4: Add the Repository to Apt Sources
echo \
  "deb [arch=$(dpkg --print-architecture) signed-by=/etc/apt/keyrings/docker.asc] https://download.docker.com/linux/ubuntu \
  $(. /etc/os-release && echo "$VERSION_CODENAME") stable" | \
  sudo tee /etc/apt/sources.list.d/docker.list > /dev/null
sudo apt-get update
Step 5: Install Docker
sudo apt-get install -y docker-ce docker-ce-cli containerd.io docker-buildx-plugin docker-compose-plugin
Step 6: Test Docker Installation
sudo docker run hello-world
Best Practices for Using Docker in Application Development
- Avoid Storing Application Data in the Container's Writable Layer: Use volumes to efficiently store data and enhance I/O performance.
- Utilize CI/CD for Testing and Deployment: Automate the building, tagging, testing, and deployment of Docker images through CI/CD pipelines to ensure consistency and reliability.
- Distinguish Between Development and Production Environments: Employ bind mounts for development to access source code and volumes for data storage in production.
- Keep Images Small: Begin with an appropriate base image, use multistage builds, minimize layers, and create a shared base image to optimize size and efficiency.
- Tag Images with Relevant Information: Use tags to include version details, intended destinations (e.g., pod, test), and stability for better management and tracking.
Creating a Dockerfile and Building Images
Crafting a Dockerfile
A Dockerfile is a text file that contains all the commands a user could execute on the command line to assemble an image. Below is an example of a Dockerfile that sets up a lightweight Python application container. It performs several key actions:
- Uses the
python:3.9-slimimage as a base. - Sets the working directory inside the container to
/app. - Copies the contents of the current directory into the container at
/app. - Exposes port 80 to the container's external network.
- Specifies that the container runs
app.pyusing Python upon launch.
Performing Tasks with Docker in a New Directory
To optimize your Docker workflows, follow these steps to create a directory for all related tasks:
- Create a New Directory: Open your terminal and run:
mkdir my_docker_project
cd my_docker_project
- Create a Dockerfile: Use a text editor to create a Dockerfile:
vi Dockerfile
- Add the Following Content to the Dockerfile:
FROM python:3.9-slim

WORKDIR /app

COPY . /app

EXPOSE 80

CMD ["python", "app.py"]
- Build the Docker Image:
docker build -t my-python-app .
- Run the Docker Container:
docker run -p 80:80 my-python-app
By following these steps, you will successfully install Docker, create a Dockerfile, build an image, and run a containerized application.
Creating a New Directory for Docker Tasks
Step 1: Create a New Directory
Open your terminal and create a new directory to organize your Docker tasks:
mkdir your-folder-name
Step 2: Navigate to the New Directory
Change your current directory to the newly created folder:
cd your-folder-name
Step 3: Initialize Your Docker Project
Within this directory, you will perform all Docker-related activities, such as creating Docker files and managing containers and images.
Step 4: Create a Separate Folder
By structuring your Docker tasks within a specific directory, you maintain a clean and efficient workflow.
Use the mkdir command to create a directory:
mkdir docker_config
Step 5: Navigate to the Created Directory
cd docker_config
Step 6: Use the touch Command to Create a Dockerfile
touch Dockerfile
Step 7: Create and Edit the Dockerfile
Now, open the file using the vi editor to edit it:
vi Dockerfile
Dockerfile Instructions
- Use a base image from Docker Hub:
FROM alpine:latest
- Set the working directory in the container:
WORKDIR /app
- Copy files from the host machine to the container:
COPY . /app
- Install the necessary dependencies:
RUN apk add --no-cache python3
- Expose a port:
EXPOSE 80
- Define a default command to run when the container starts:
CMD ["python3", "app.py"]
Grant User Access to the Docker Socket
To manage Docker effectively, you may need to grant user access:
chown $USER /var/run/docker.sock
Building an Image Using the Dockerfile
This Dockerfile outlines a clear, reproducible method for constructing a containerized Python application:
docker build -t my-image .
This command builds your Docker container based on the specifications outlined in your Dockerfile. Run this command within the docker_config directory where your Dockerfile is located. The -t flag tags your image as my-image for convenient reference.
Verify Docker Image Creation
To verify that your Docker image has been successfully built, use the following command, which will list all Docker images on your system:
docker images

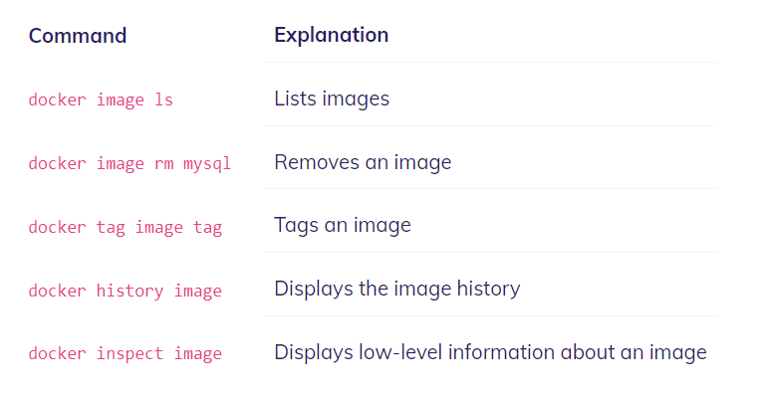
Managing Docker Images
- To remove an image, use:
docker rmi image_name/image_id
- To list existing images:
docker image ls
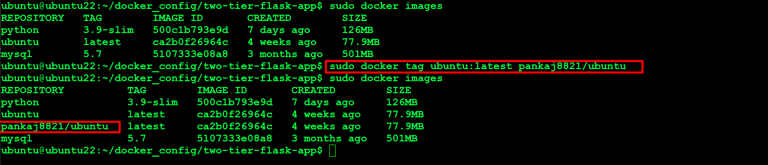
- To tag an image:
docker tag image_name/image_id tag_name
- More commands-
Common Dockerfile Instructions
- FROM: Specifies the base image for the Docker image.
- RUN: Executes a command during the build process.
- COPY: Copies files from the build context to the Docker image.
- ENV: Sets an environment variable in the Docker image.
- EXPOSE: Exposes a port in the Docker image.
- CMD: Specifies the default command to run when the Docker container is started.
- WORKDIR: Sets the working directory in the Docker image.
- VOLUME: Creates a volume in the Docker image.
- USER: Sets the user and group ID for the Docker image.
- ENTRYPOINT: Specifies the entry point for the Docker container.
Running Docker Containers
Docker containers are lightweight, standalone packages that encompass everything needed to execute a software application, including code, runtime, libraries, environment variables, and system tools. They isolate the software from its environment, ensuring it operates uniformly despite differences between environments, such as development and production.
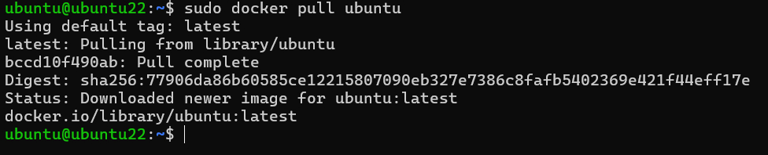
Downloading Images from Docker Hub
To download images from Docker Hub, use the following command:
docker pull <image-name>
For example:
- For Ubuntu:
docker pull ubuntu
- For MySQL:
docker pull mysql
- For Nginx:
docker pull nginx
Ensure Docker is installed and running before executing these commands. This will pull the latest version of the specified image from Docker Hub to your local machine.
Checking Docker Images
To list all available Docker images:
docker images

Running a Docker Container
To run a Docker container, use:
docker run [OPTIONS] IMAGE [COMMAND] [ARG...]
Replace IMAGE with the name of the Docker image you want to run. OPTIONS can customize the command’s behavior (e.g., -d to run the container in detached mode). COMMAND and ARG can be specified to run a particular command inside the container. For example, to run an Ubuntu container:
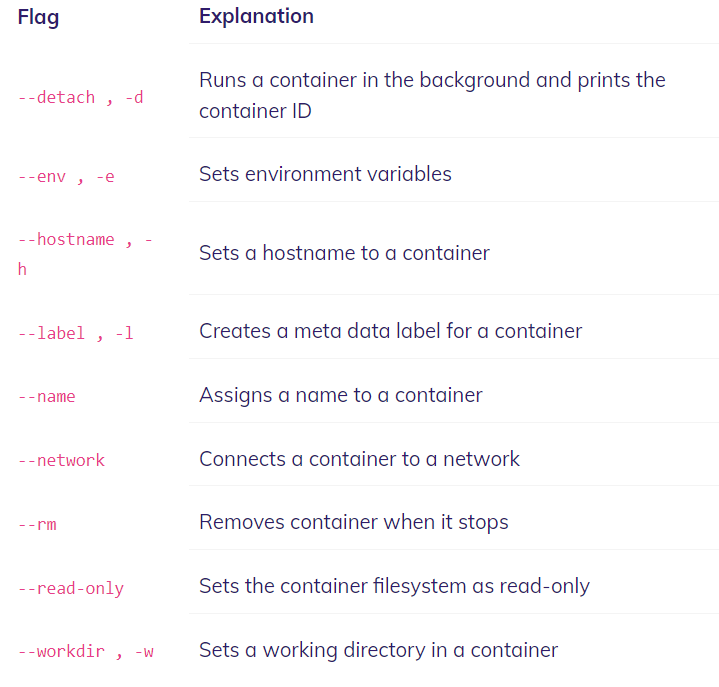
docker run -d ubuntu

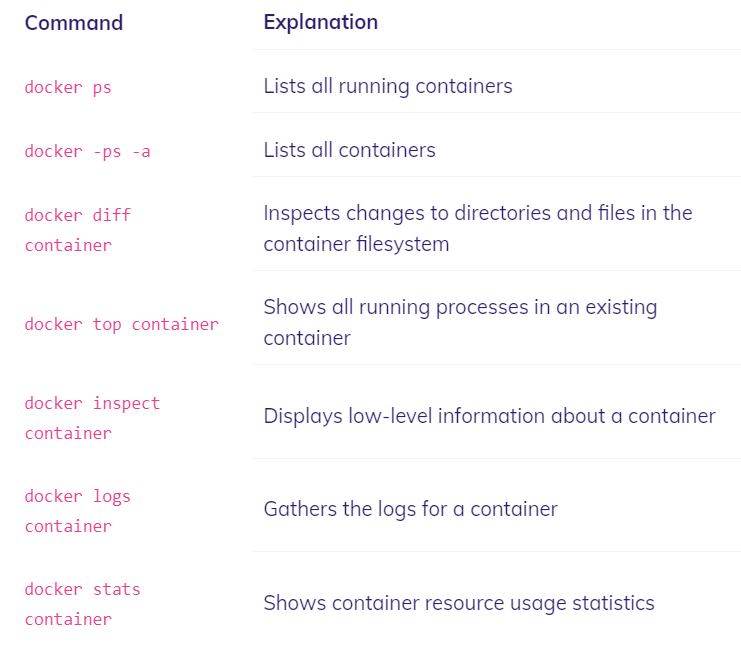
Container Management Commands
- List running containers:
docker ps -a

- Check differences in the container:
docker diff container_name/container_id

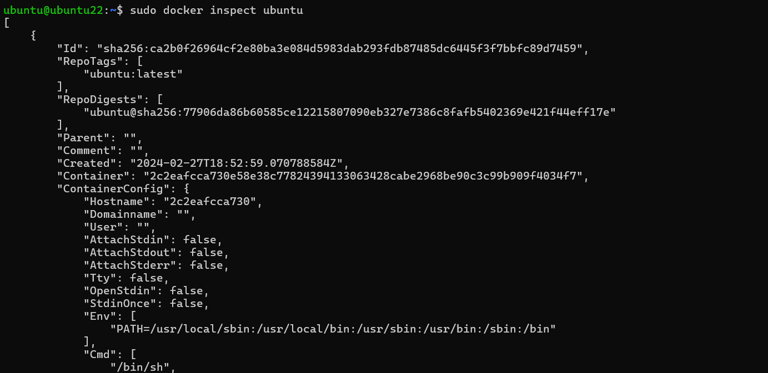
- Inspect a container:
docker inspect container_name/container_id
- Start a stopped container:
docker start container_name/container_id

Docker Compose
Setting Up Docker Compose
Docker Compose is a tool that simplifies the management of multi-container applications by allowing you to define and run them using a single YAML file. It automates the process of managing several Docker containers simultaneously, making workflows quicker, easier, and more repeatable compared to manual methods.
Understanding Docker Compose
Docker Compose is essential for developers working with Docker, especially when dealing with multi-container applications. At its core, it uses a single YAML (.yml) file to define multiple containers and their relationships, facilitating management as a single service.
Key Features:
- Multi-container Management: Manage multiple containers as a single service, streamlining development and testing workflows.
- YAML File Configuration: Configure services, networks, and volumes within a single YAML file for straightforward setup and version control.
- Automation: Define all service dependencies in one file for automated deployment.
- Environment Standardization: Guarantee consistent operation across environments, eliminating compatibility issues.
Prerequisites
Make sure you have:
- The latest version of Docker installed.
- A basic understanding of Docker concepts.
Installation Instructions
- Update and upgrade the system:
sudo apt-get update -y && sudo apt-get upgrade -y
- Install Docker Compose:
sudo apt-get install docker-compose -y
Check Docker Compose Version
Verify the installation by checking the version:
docker-compose version
Sample Configuration for Docker Compose
To set up Docker Compose with a web application service and a MySQL database, follow these steps:
Step 1: Create a Project Directory
mkdir docker_project
cd docker_project

Step 2: Create a Docker Compose File
Create a file named docker-compose.yml and define services:
vi docker-compose.yml
Step 3: Add the Following Example Configuration:
version: '3'
services:
  web:
    image: nginx
    ports:
      - "80:80"
    depends_on:
      - db
  db:
    image: mysql
    restart: always
    ports:
      - "3306:3306"
    environment:
      MYSQL_ROOT_PASSWORD: example
      MYSQL_DATABASE: mydb
      MYSQL_USER: myuser
      MYSQL_PASSWORD: mypassword
Step 4: Build and Run Your Application with Docker Compose
Run the following to start your services:
sudo docker-compose up -d
The -d flag runs the services in detached mode.

Verify Running Services
Check the status of your running services:
sudo docker-compose ps

Accessing Services
- Web Service: Access the Nginx web server at
http://server_ip_address:80. - MySQL Database: For MySQL, connect using a client or service on port 3306.
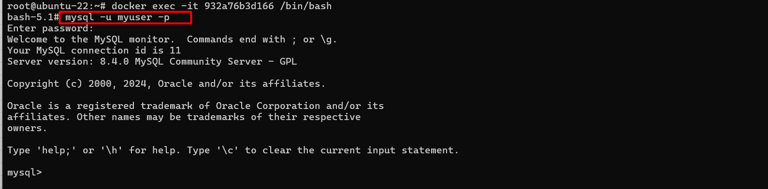
Logging Into Your MySQL Database
To log into your MySQL database, execute:
docker ps -a

docker exec -it container_ID /bin/bash

Then run:
mysql -u username -p
Pushing an Image to Docker Hub
Preparing to Push
First, sign up for an account on Docker Hub at Docker Hub.
Steps to Push an Image
- Log In to Docker Hub:
docker login
Provide your Docker Hub credentials when prompted.
- Tag Your Image:
docker tag <local-image> <username>/<repo>:<tag>
- Push the Image:
docker push <username>/<repo>:<tag>
Verify on Docker Hub
Check Docker Hub to confirm your image appears in your repository.
To Summarize:
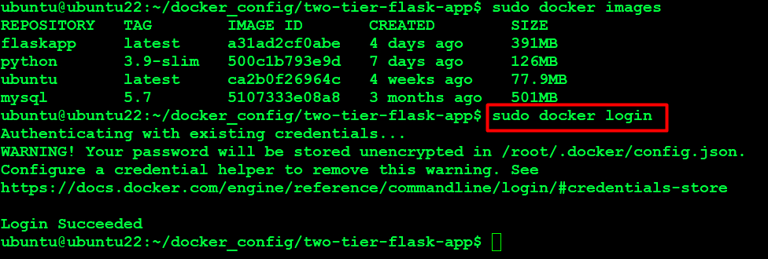
- Log into Docker Hub:
sudo docker login
- Check your images:
docker images
- Tag your image:
sudo docker tag your_image_name:latest docker_hub_username/new_name_image