Application Deployment on Instances
Ansible, an open-source automation tool, helps reduce complexity and supports versatile tasks. Using Ansible allows automating nearly any operation.
Deploying an Application on an Instance
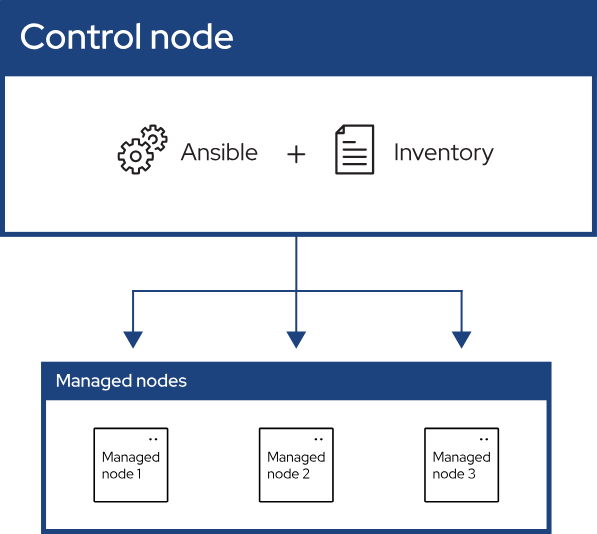
Requirements:
- One Ansible Control Node
- One or more Ansible Managed Nodes
- Ensure all nodes use the same SSH_KEY
- Verify the Ansible Control Node is set up to manage the Ansible Hosts over SSH.
- Operating System: Ubuntu 22.04
Step 1: Update and Upgrade All Nodes
Run the following command on all nodes:
sudo apt-get update -y && sudo apt-get upgrade -y
Step 2: Establish SSH Connection Between Nodes
On the Control Node, navigate to the .ssh directory:
cd ~/.ssh/

Create a file named ansible_key:
vi ansible_key

Paste the key you downloaded during server creation into the file.

Secure the key by modifying file permissions:
chmod 700 ~/.ssh/
chmod 600 ~/.ssh/ansible_key
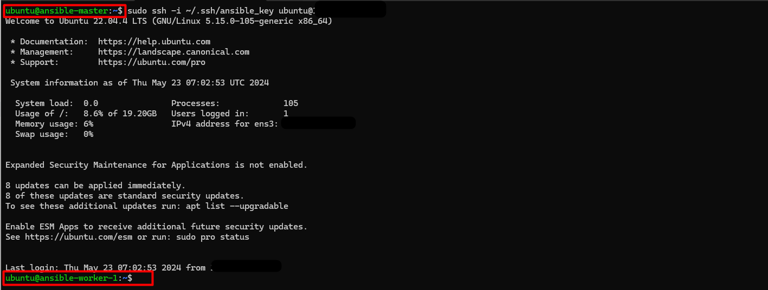
Test the SSH connection from the Control Node to the Managed Nodes.
Installing Ansible on the Control Node
To manage infrastructure with Ansible, the software must be installed on the Control Node.
Step 3: Add the Official Ansible PPA
sudo apt-add-repository ppa:ansible/ansible
Step 4: Refresh the Repository
sudo apt-get update -y
Step 5: Install Ansible
sudo apt-get install ansible -y
Creating an Ansible Inventory File
The Inventory File lists the hosts managed by Ansible. Choose between INI and YAML formats.
INI Format Example:
[webservers]
webserver1.example.com
webserver2.example.com

[dbservers]
dbserver.example.com
YAML Format Example:
children:
  webservers:
    hosts:
      webserver1.example.com:
      webserver2.example.com:
  dbservers:
    hosts:
      dbserver.example.com:
To create an inventory file, use the following command:
vi /etc/ansible/hosts

Add the following content:
[servers]
server1 ansible_host=<Host-1_IP>
server2 ansible_host=<Host-2_IP>

[all:vars]
ansible_python_interpreter=/usr/bin/python3
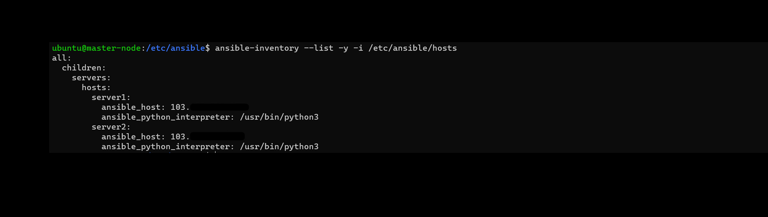
Validate the Inventory File
Use this command to check the file:
ansible-inventory --list -y -i /etc/ansible/hosts
Testing Connections Between Nodes
To ensure successful connectivity, use the ping module:
ansible all -m ping -i /etc/ansible/hosts --private-key=~/.ssh/ansible_key

Check available storage:
ansible all -a "free -h" -i /etc/ansible/hosts --private-key=~/.ssh/ansible_key

Check server uptime:
ansible servers -a "uptime" -i /etc/ansible/hosts --private-key=~/.ssh/ansible_key

Writing and Executing Playbooks
A playbook is where you define automated tasks. Use a YAML file for your playbooks.
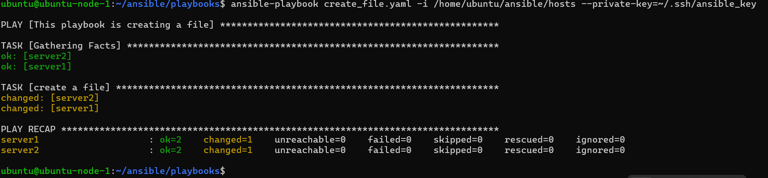
Example: Creating a File on All Nodes
Navigate to the playbook directory:
sudo mkdir -p /etc/ansible/playbook/
cd /etc/ansible/playbook/
vi create_file.yml
Add the following content:
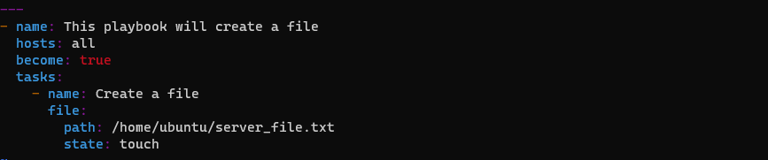
name: This playbook creates a file
hosts: all
become: true
tasks:
    name: Create a file
    file:
      path: /home/ubuntu/server_file.txt
      state: touch
Run the playbook:
ansible-playbook create_file.yml -i /etc/ansible/hosts --private-key=~/.ssh/ansible_key
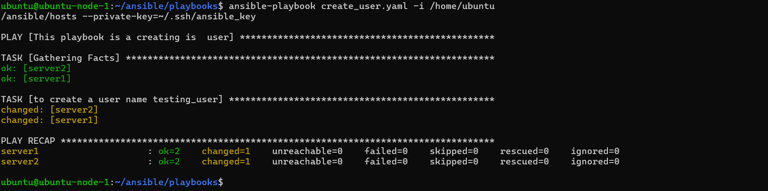
Adding a User to All Servers
Create a playbook to add a user:
vi playbook_user.yml

Insert the following content:
name: This playbook creates a user
hosts: all
become: true
tasks:
  - name: Create a user named testing_user
    user:name = server_testing_user
Run the playbook:
ansible-playbook playbook_user.yml -i /etc/ansible/hosts --private-key=~/.ssh/ansible_key
Installing Docker via Ansible
To deploy Docker, follow these steps:
- Prepare the Inventory File (already created).
- Install the Docker Role.
- Write a Playbook.
- Execute the Playbook.
Docker installation requires adding GPG keys and repositories, which can be included in the playbook.
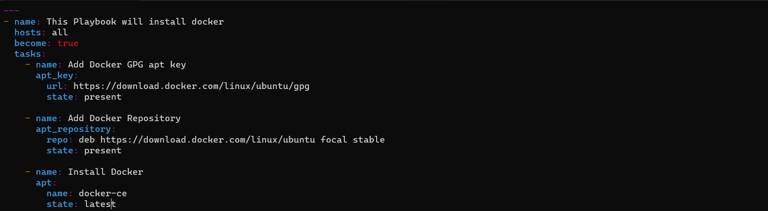
Example: Docker Installation Playbook
Navigate to the playbook directory:
cd /etc/ansible/playbook/
vi docker_install.yml
Add content to install Docker:
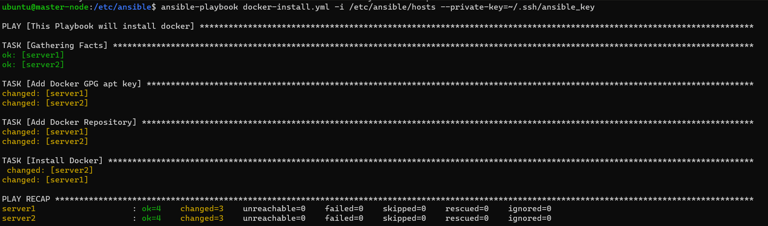
Run the playbook:
ansible-playbook docker_install.yml -i /etc/ansible/hosts --private-key=~/.ssh/ansible_key
Verify Docker installation on nodes:
docker -v
By following this procedure, Docker will be successfully installed across all nodes managed by Ansible, ensuring uniform environments.